
Gordon Ramsay Chicken Broth Recipe
Gordon Ramsay chicken broth is your gateway to flavor city! Picture this: a simmering pot of rich, aromatic broth, filling your kitchen with mouthwatering scents that make your heart skip a beat. I used to struggle with bland broth, thinking it was just something to simmer while I went about my day. But that’s when I discovered Ramsay’s way—every ingredient plays a vital role, and with the right technique, you’ll be left with a silky, flavorful elixir that enhances any dish. Whether you’re looking for a comforting soup base or a rich sauce, this broth is your culinary secret weapon. So roll up your sleeves and let’s make something that’ll have you strutting around the kitchen like you’re on MasterChef!

Ingredients, tools and the blueprint for great broth
What to buy and exact quantities for a 3–4 litre batch
Use roughly 1.2–1.5 kg of chicken bones or carcasses — leftover roast carcass, backs, necks, and wing tips all work. Add 1 large onion (200–250 g) halved and unpeeled, 2 carrots (about 200 g), 2 celery stalks (about 150 g), 2 bay leaves, 6–8 black peppercorns, a head of garlic halved, and a small bunch of parsley and thyme tied together. Cover with 3–4 litres cold water, add 15–25 ml apple cider vinegar to help draw out gelatin, and salt lightly (2–3 g); taste and adjust after reduction. For a pressure cooker or Instant Pot, halve the water to 2–2.5 L and keep bones under the max fill line.
Essential tools and their precise roles
Use a wide, heavy-bottomed stockpot (5–7 L) for even simmering or a pressure cooker/Instant Pot to save time. You’ll also want a roasting tray if you brown bones, a fine-mesh sieve and cheesecloth for a clear stock, plus a ladle and measuring cups. A fat separator or large measuring jug makes degreasing easier and a thermometer helps if you plan to reuse cooked meat — chicken should hit 74°C (165°F).
Why each ingredient matters (and what to swap)
Bones give flavor and gelatin; roasted bones add color and meaty notes. Onion and carrot bring sweetness and aroma, celery provides the savory backbone, and bay, pepper and thyme add structure while garlic and parsley lift freshness. Swap parsley for cilantro in Asian versions or use rosemary instead of thyme for a stronger profile, and if you want a lighter broth use more white parts like necks and wings while feet or extra necks add more gelatin.
Stovetop simmer method — slow, simple, failproof
Step-by-step stovetop process with timings and temps
I start cold: put bones and vegetables in the pot, cover with 3–4 L cold water, add the vinegar, and bring up gently until small bubbles break the surface (about 80–90°C). Once it reaches a simmer, cut the heat so it stays between 85–95°C and skim foam in the first 20–30 minutes, then leave the lid slightly ajar. Simmer 3–4 hours for a regular broth or 8–12 hours for a very gelatinous stock, and taste around 2 hours to check progress.
How to control flavor during the long simmer
Taste at two hours and again near the end; if it tastes thin, reduce uncovered 15–30 minutes and adjust salt in 1 g increments. If the broth turns bitter from overbrowning, add a peeled carrot or 5–10 ml apple juice and simmer a bit to balance it. If it’s too greasy, chill and remove solidified fat before reheating, and avoid salting heavily early since reductions concentrate salt quickly.
Clarifying on the stovetop for crystal-clear results
Cool the broth a little and skim off fat, then whisk one egg white with 10 ml cold water per litre and stir it into warm (not boiling) broth at 70–80°C. Hold at a bare simmer for 10–15 minutes so the egg white coagulates and traps solids, then strain through a fine-mesh sieve lined with cheesecloth for a clear consommé. For background on similar preparations see
Roast-first, pressure-cooker and quick methods — when to use each
Roast-first for deeper flavor: oven timings and tips
Roast bones and veg at 220°C (425°F) for 35–45 minutes until well browned to build Maillard flavor. Spread bones and halved onions on a tray, drizzle 15–30 ml oil, and turn once so everything browns evenly. Transfer the roasted bits to the pot, deglaze the tray with 50–100 ml water or wine and add that liquid to the stock for extra flavor, then simmer 2–4 hours as needed.
Pressure-cooker/Instant Pot: fast, full-bodied broth (times and ratios)
For a quick, rich result use 1–1.5 kg bones with 2 L cold water, vegetables, and 15–20 ml vinegar in the pot. Seal and cook on high pressure for 60–90 minutes, then let the pressure release naturally for 15–20 minutes; the result will be gelatinous and close to a long simmered broth. If you need a deeper concentration, reduce on sauté mode but keep bones and liquid below the max fill line.
Grill and air-fryer tweaks — smoky, concentrated broths
Char bones and vegetables on a hot grill or in an air fryer at 200–210°C (400–410°F) for 12–20 minutes, turning once for even color. Use those browned bits in the pot and deglaze the grill or basket with hot water to capture the fond. Combine grill-roast with a short stovetop simmer (about 2 hours) or use the pressure cooker for a smoky base for ramen or bold sauces.
Strain, reduce, season and store — finishing like a pro
Straining, reducing and concentrating with exact steps
When the simmer is done, remove bones and veg with tongs and pick any meat for another use. Pour the broth through a fine-mesh sieve lined with cheesecloth into a clean pot and cool slightly. To concentrate, simmer uncovered at medium-low and reduce by 25–50% depending on use — aim 30–50% for sauces and 10–20% for soups — and taste every 10 minutes, adjusting salt only after reduction to avoid oversalting.
Safe cooling, chilling and precise storage instructions
Cool quickly by dividing hot broth into shallow containers no deeper than 5 cm, then place them in an ice bath until the temperature drops under 5°C within 90 minutes. Store sealed in the fridge at 0–4°C for 3–4 days, or freeze in 250–500 ml portions or silicone trays, then transfer to labelled freezer bags for 3–6 months. Reheat to a vigorous boil for at least 1 minute to ensure safety and avoid leaving hot broth at room temperature for more than 2 hours.
Degreasing, reheating and salt control
After chilling, lift off solidified fat with a spoon or use a fat separator while the broth is warm. If a reduction left the broth too salty, add unsalted water or a few pieces of unsalted cooked veg and simmer 10–15 minutes, then strain. For a quick degrease, skim surface fat with paper towel from a chilled bowl, and always finish seasoning at the end since reductions concentrate salt fast.
Fixes, mistakes and troubleshooting — what to do when things go wrong
Cloudy broth? Causes and surgical fixes
Cloudiness usually comes from a rolling boil, chopped vegetables, or fat emulsification. Fix it by cooling, skimming fat, and clarifying with the egg-white raft: whisk one egg white per litre with 10 ml water, stir into warm broth (70–80°C), simmer gently 10–15 minutes, then strain. If the broth tastes bitter from overbrowning, simmer with a peeled carrot or add 5–10 ml of apple juice to balance and taste again.
Too thin, too salty, or flat — practical rescues
If the broth is thin, reduce by simmering uncovered 15–45 minutes until it reaches the intensity you want, then check salt. If it’s too salty, add unsalted water and a raw peeled potato or some rice, simmer 10–15 minutes, then remove — starch helps pull out salt. If it tastes flat, add fresh herbs at the end, a squeeze of lemon (5–10 ml), or 10–15 ml soy sauce for an Asian twist, and always make small adjustments and taste each time.
Food safety traps and how to avoid them
Never cool large volumes at room temperature; use shallow pans and ice baths. Freeze promptly if you won’t use the broth within three days, and only reuse cooked chicken that reached 74°C (165°F) when first cooked. If the broth smells off or shows mould, toss it — don’t try to rescue it with boiling or spices.
Variations, uses, nutrition and serving ideas
Three distinct variations with exact ingredient swaps
- Rich gelatinous bone broth: add 400–600 g chicken feet or extra necks and 30 ml apple cider vinegar, simmer 12 hours (or 90 minutes in a pressure cooker) for a jelly-like set when chilled.
- Asian-style broth: omit parsley, add 60 g sliced ginger, 3 star anise, 1 cinnamon stick and 30–50 ml light soy sauce near the end; finish with sliced scallions and 10–15 ml sesame oil.
- Light, clear consommé: roast the bones lightly, simmer 3 hours, clarify with an egg-white raft, and finish with a bouquet garni.
Nutrition, benefits and what to expect per serving
Nutritional content varies: a clear chicken broth generally gives 30–70 kcal per 250 ml depending on reduction and fat content, with 3–7 g protein and minimal carbs. Gelatin-rich broths provide collagen-related amino acids and feel more filling, while sodium rises if you salt early or reduce heavily. If you watch sodium, salt at the end and keep portions moderate; use low-sodium soy for Asian versions.
2–3 serving suggestions and kitchen uses beyond soup
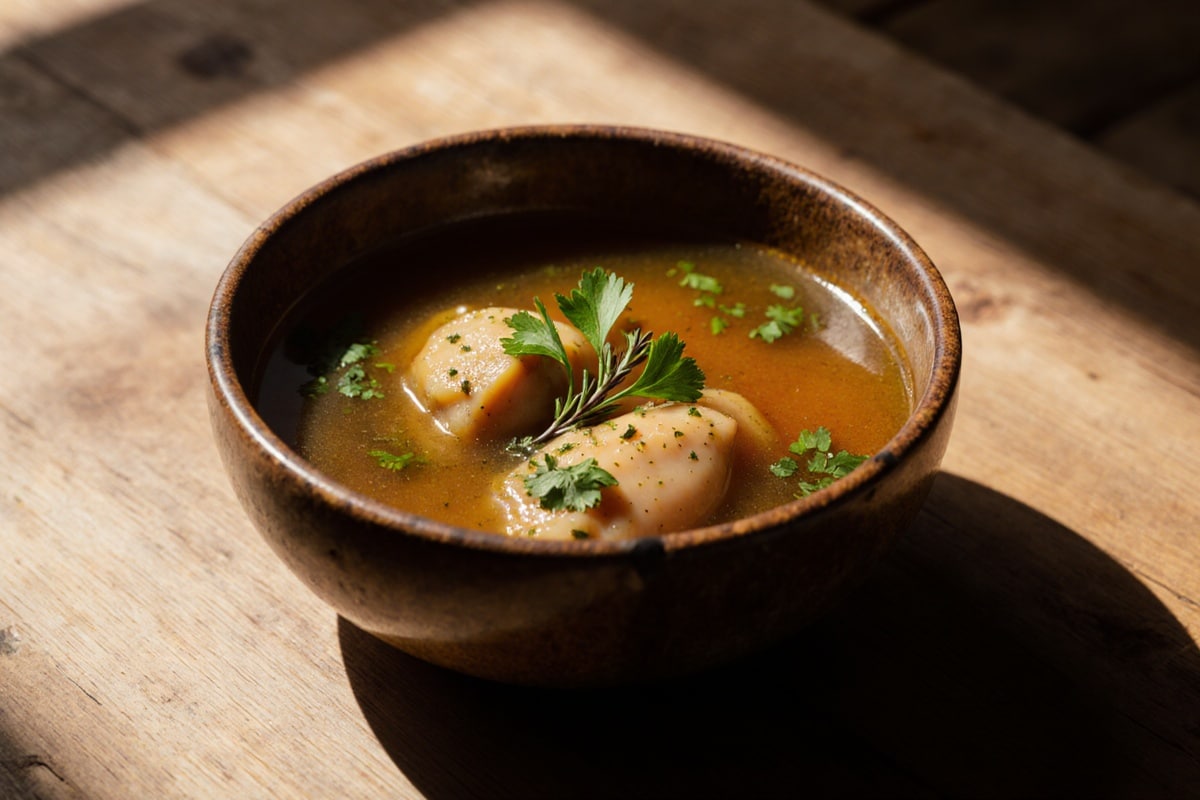
- Classic starter: ladle 250–350 ml hot broth into warmed bowls, garnish with chopped parsley and cracked pepper for a clean, comforting starter.
- Ramen bowl: use broth reduced 20–30%, add noodles, a soft-boiled egg (63°C/145°F for 45–60 seconds in simmering water — watch closely), bok choy, and sliced pork.
- Risotto and sauces: swap half the stock in risotto for richer flavor, or reduce broth to a glaze for pan sauces; freeze portions for quick flavor boosts in sautés and stews.
Three rapid variations if you’re short on time or ingredients
- Weeknight shortcut: pressure-cook 60–90 minutes with 1 kg mixed bones and 1.5 L water, then cool and strain for a fast, useful base.
- Pantry broth: use carcasses or leftover rotisserie chicken with frozen veg, simmer 60–90 minutes, strain, and use right away.
- Vegetarian “broth”: simmer 400 g mixed mushrooms, 2 carrots, 1 onion and a strip of kombu in 2 L water for 40–60 minutes for a deep, savory alternative.
Gordon Ramsay Chicken Broth
Ingredients
Equipment
Method
- Start cold: place bones and vegetables in the stockpot, cover with 3–4 L cold water, add vinegar, and gently bring to approx. 80–90°C.
- Once it reaches a simmer, drop heat to maintain 85–95°C and simmer gently. Skim foam in the first 20–30 minutes; leave lid slightly ajar.
- Simmer for 3–4 hours for regular broth, or 8–12 hours for extremely gelatinous bone broth.
- At 2 hours, taste and adjust flavor if necessary. If too thin, reduce by simmering uncovered 15–30 minutes.
- For clarity, chill broth slightly, skim fats, then clarify with egg white raft method, simmer gently for 10-15 minutes, and strain.
- After chosen simmer time, remove bones and veg with tongs, cool slightly, and strain through a fine-mesh sieve lined with cheesecloth.
- To concentrate, simmer uncovered at medium-low and reduce by 25–50% depending on use; for sauces aim for higher concentration.
Nutrition
Notes
Love this recipe?
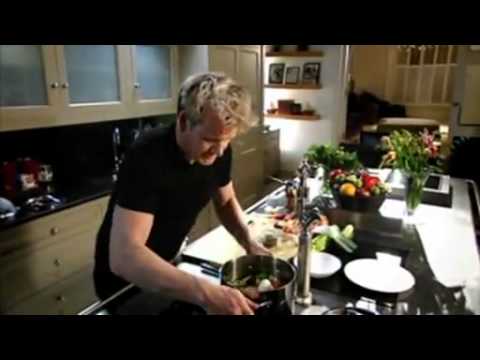
Give us 5 stars and comment!Video tutorial: gordon ramsay chicken broth
FAQ – gordon ramsay chicken broth
Frequently Asked Questions
How can I fix a cloudy broth?
Cloudiness usually comes from boiling too hard or chopping veggies too finely. Skim off the fat, then use the egg-white raft method: whisk an egg white with a little water, stir in, and simmer gently. The egg will trap impurities, leaving you with a crystal-clear broth!
Why is my chicken broth too salty?
If your broth is too salty, add unsalted water or a raw peeled potato and let it simmer a bit. The starch from the potato will absorb some of that saltiness. Just be sure to taste as you go!
Can I freeze chicken broth? How long does it last?
Absolutely, you can freeze it! Just portion it out into silicone molds or airtight bags and label them with a date. It’ll last 3–6 months in the freezer. Just remember to bring it back to a rolling boil when reheating for safety.
What’s the best way to store leftover broth?
Store your broth in sealed containers at 0–4°C for 3–4 days in the fridge. For longer storage, freezing is your best bet! Just make sure to cool it quickly and avoid leaving it at room temperature for more than 2 hours to keep it safe.
Conclusion
You did it! That golden liquid bubbling away is proof you’ve mastered the art of Gordon Ramsay chicken broth. The rich aroma wafting through your kitchen is practically a medal of honor—you can practically taste the hours of love and dedication in each spoonful. Have that first taste: it’s warm, comforting, and hugs you from the inside. You didn’t just follow a recipe; you crafted a culinary foundation that can elevate your soups, sauces, and even cozy weeknight dinners. Now it’s your turn — make it bold, make it yours!


