Gordon Ramsay Chocolate Fondant: A Shockingly Easy 3-Step Method
The most terrifying 12 minutes in home baking belong to the Gordon Ramsay chocolate fondant. Every recipe you find online gives you a time and a temperature, and every time, it feels like a gamble. You pull the ramekins from the oven, turn one out onto a plate, and hold your breath as you make the first cut, praying for that river of molten chocolate. Too often, what you get is a solid, slightly dry, heartbreaking little cake.
I know, because I’ve made that sad little cake. I’m Dunning Claire, and I’m the obsessive home cook who got tired of the guesswork. I went back to the source—the frantic, high-pressure TV segments—and I found the secret. It’s not about the timer. It’s about the test.
This is the definitive guide to the authentic Gordon Ramsay chocolate fondant. It’s not just another recipe. It’s a foolproof method, built around a core Ramsay principle that guarantees a perfect liquid center every single time. This is how you remove the fear and master the fondant.
The Method: It’s About Technique, Not Time
A perfect Gordon Ramsay chocolate fondant is a game of two textures: a delicate, firm cake on the outside and a hot, liquid chocolate sauce on the inside. Achieving this requires a deep respect for the ingredients and the process. Other recipes will fail you; this method will not.
- The Chocolate is King: This dessert is almost entirely chocolate. If you use cheap, waxy chocolate, you will get a cheap, waxy fondant. You must use high-quality dark chocolate, ideally around 70% cocoa solids. The better the chocolate, the richer the flavor and the more luxurious that molten lava center will be. This is a non-negotiable first step for a real Gordon Ramsay chocolate fondant.
- The Flour is Just a Binder: Notice how little flour is in this recipe. That is intentional. This is not a cake. The flour is there for one reason only: to provide just enough structure to hold the eggs and chocolate together. If you add even a little too much, you are making a cupcake, and you will never get a liquid center.
- The Ramekin Prep: Your Release Insurance: Ramsay is meticulous about this. You must generously butter every crevice of the ramekins, then dust them with cocoa powder, tapping out the excess. This creates a non-stick barrier of fat and a dry powder that allows the delicate, barely-set fondant to slide out cleanly without collapsing.
- The Ramsay Test: Bake One to Sacrifice. This is the single most important technique, pulled directly from his high-pressure kitchen philosophy. Every home oven is different. Your “12 minutes” is not the same as mine or Ramsay’s. The only way to know for certain when the fondants are ready is to bake one extra. You sacrifice this test dummy a minute or two early to check the center. Is it too liquid? They need more time. Is it almost set? Pull them now. This test removes all guesswork and is the secret to a perfect Gordon Ramsay chocolate fondant.
Mistake Watchouts: I Made a Chocolate Puck So You Don’t Have To
My first attempt at a Gordon Ramsay chocolate fondant was a catastrophic failure. I followed a popular recipe online to the letter. “Bake for 12 minutes,” it said. So I did. I pulled them from the oven, they looked perfect. I turned one out, dusted it with sugar, and confidently made the first cut with a spoon. There was no ooze. No lava. Just a uniform, slightly dry crumb. A sad, pathetic chocolate puck.
- The Mistake: Trusting the Timer. The “12-minute rule” is a lie. Not a malicious one, but a lie nonetheless. It doesn’t account for your oven’s true temperature, the starting temperature of your batter, or the material of your ramekins. Relying on a fixed time when success is measured in seconds is a recipe for disaster.
- The Fix: Master The Ramsay Test. Bake an extra fondant. Sacrificing one to guarantee the perfection of the others is the ultimate pro move. It is the only way to be certain. This is the core principle of a successful Gordon Ramsay chocolate fondant.
- The Mistake: A Grainy, Seized Chocolate Mess. In another attempt, a single drop of water from my double boiler fell into my melting chocolate. It instantly seized up, turning from a glossy liquid into a stiff, grainy paste.
- The Fix: Be meticulous. Ensure your bowl is bone dry and that no water or steam can get near your melting chocolate. If it seizes, it’s ruined. Start over. There is no saving it.
The Recipe: Gordon Ramsay’s Perfect Chocolate Fondant
Gordon Ramsay’s Perfect Chocolate Fondant
Ingredients
Equipment
Method
- Prep Ramekins: Preheat oven to 400°F / 200°C. Generously brush the inside of 4-5 ramekins with softened butter. Dust thoroughly with cocoa powder, rotating to coat all sides, then tap out the excess. Place ramekins on a baking sheet.
- Melt Chocolate: In a dry, heatproof bowl set over a saucepan of simmering water, melt the dark chocolate and butter together. Stir occasionally until smooth and glossy. Remove from heat and set aside to cool slightly.
- Make the Batter: In a large bowl, use an electric mixer to whisk the whole eggs, egg yolks, and sugar on high speed for 3-5 minutes. The mixture should be pale, thick, and have tripled in volume, forming ribbons when the whisk is lifted.
- Fold the Mixtures: Gently pour the cooled chocolate mixture into the whipped eggs. Using a large spatula, fold it in carefully until just combined. Sift the flour over the top and gently fold again until no streaks remain. Do not overmix or you will knock the air out.
- Fill and Bake: Divide the batter evenly among the prepared ramekins. Place the baking sheet in the oven and bake for 10-14 minutes. The edges should look set and be pulling away slightly from the sides, while the center should still have a distinct wobble.
- The Ramsay Test (Optional but Recommended): If using a 5th ramekin, sacrifice it now by removing it from the oven and checking the center. This will tell you precisely how much longer the others need.
- Rest and Serve: Remove the fondants from the oven and let them rest in their ramekins for exactly 1 minute. No more, no less. Carefully invert each fondant onto a serving plate, serve immediately with a scoop of vanilla bean ice cream.
Nutrition
Notes
Love this recipe?
Give us 5 stars and comment!The Execution: Step-by-Step
- Prep the Ramekins: Generously brush the inside of 4-5 ramekins with softened butter. Dust thoroughly with cocoa powder, tapping out any excess. Place on a baking sheet.
- Melt Chocolate: In a heatproof bowl set over a saucepan of simmering water (a double boiler), melt the dark chocolate and butter together, stirring until smooth and glossy. Remove from heat and set aside to cool slightly.
- Make the Batter: In a separate large bowl, whisk the whole eggs, egg yolks, and sugar together with an electric mixer on high speed for 3-5 minutes, until the mixture is pale, thick, and has tripled in volume.
- Fold: Gently fold the melted chocolate mixture into the egg mixture using a spatula. Do this in two stages to avoid deflating the air. Sift the flour over the top and gently fold it in until just combined. Do not overmix.
- Fill and Chill: Divide the batter evenly among the prepared ramekins. At this point, you can bake them immediately or chill them in the fridge for up to a few hours (this will affect baking time).
- The Bake (and the Test): Preheat your oven to 400°F (200°C). Bake for 10-14 minutes. The edges should be firm and pulling away from the sides, while the very center should still have a slight wobble. This is where you sacrifice your extra fondant to test for the perfect molten interior.
- Rest and Serve: Let the fondants rest in their ramekins for exactly 1 minute. Then, carefully invert each one onto a serving plate. Serve immediately with vanilla bean ice cream.
Sanctioned Riffs (Variations That Respect the Method)
The core batter of a Gordon Ramsay chocolate fondant is sacred. However, you can introduce a surprise inside. A single high-quality salted caramel truffle or a teaspoon of thick dulce de leche dropped into the center of the batter before baking works beautifully. You can also add a splash of dark rum or Grand Marnier to the chocolate mixture for an extra layer of flavor.
Plating and Execution
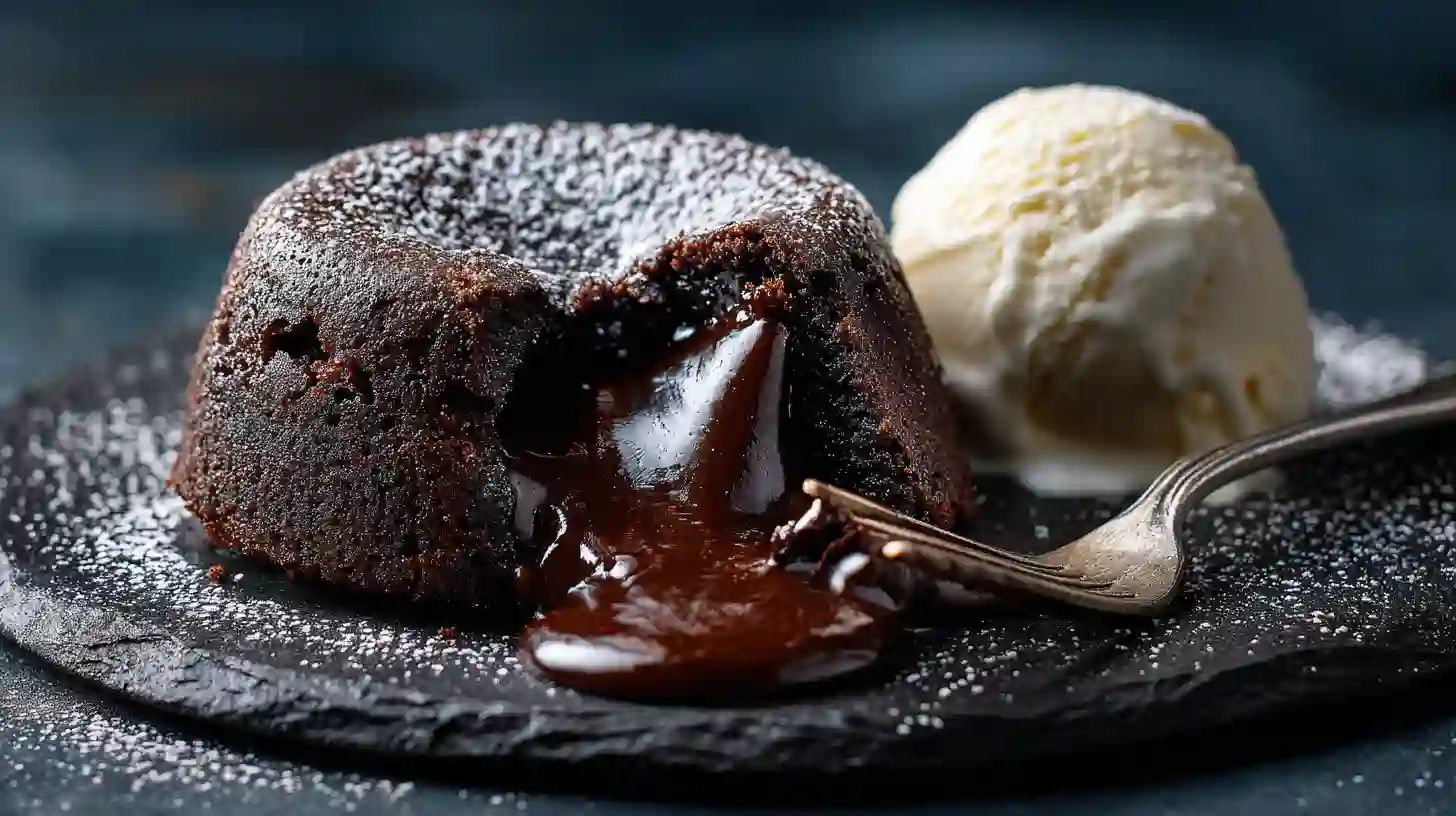
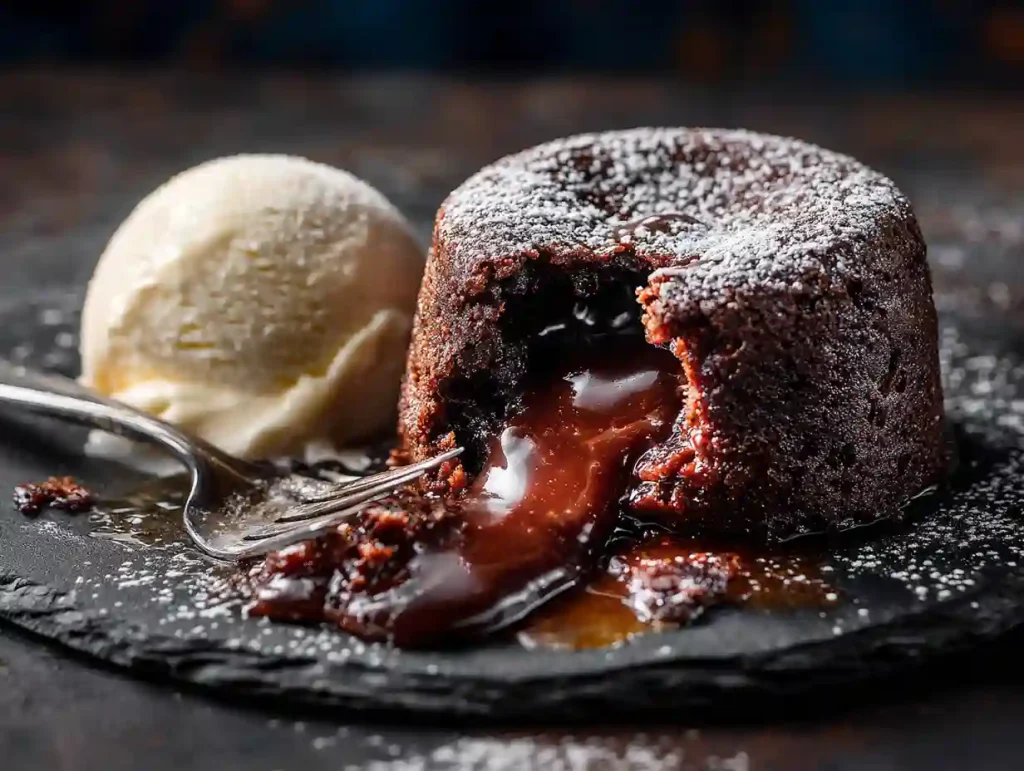
This dessert is pure drama. Place the inverted fondant slightly off-center on a dark plate. Dust it lightly with powdered sugar. Place a perfect quenelle or scoop of high-quality vanilla bean ice cream next to it. Hand the spoon to your guest and watch their face as they make the first cut. The contrast between the hot, flowing chocolate and the cold, melting ice cream is what makes a Gordon Ramsay chocolate fondant a legendary dessert.
Recipe FAQs
Why did my Gordon Ramsay chocolate fondant collapse?
This is almost always due to improper ramekin preparation. If you missed a spot with the butter or didn’t get an even coating of cocoa powder, the delicate cake will stick to that spot and tear as you try to invert it.
Can I make the batter ahead of time?
Yes. You can make the batter and fill the prepared ramekins up to 24 hours in advance. Keep them covered in the fridge. Note that you will need to add 2-4 minutes to the baking time as you will be baking from cold. Always use the “Ramsay Test” to be sure.
What’s the difference between a chocolate fondant and a lava cake?
They are essentially the same thing. “Fondant” is the more traditional French and British term for this dessert, which literally means “melting.” “Lava cake” is the more common American term. A Gordon Ramsay chocolate fondant is his take on this classic.
The Result & Conclusion
When you get this right, it is a moment of pure culinary theater. The outside is a warm, delicate, intensely chocolatey cake. But the inside—the inside is a hot, rich, liquid river of pure chocolate sauce that flows across the plate. It is the ultimate dessert experience. You didn’t just follow a recipe and hope for the best. You used a professional method to guarantee a perfect result. You conquered the most feared dessert in home baking. You mastered the Gordon Ramsay chocolate fondant.
Your Turn. Get to Work.
You’ve mastered a legendary dessert that strikes fear into the hearts of most cooks. Now, apply that same precision to other Ramsay classics. Continue your education with the definitive guide to Gordon Ramsay’s Dessert and Baking Recipes.

